Showing posts with label digital template. Show all posts

Saturday, September 18, 2010

Organizing Supplies

Haven’t managed to post this week as I’ve been busy organizing my digital supplies. Last weekend as I said in my last post there was a big sale at www.designerdigitals.com and as a result my bank account is $50 lighter and my supply selection is boosted by some great additions. My problem has been that as I’ve added more supplies to my collections its been harder to remember what I did or didn’t have and where it was saved. Which meant when I was scrapbooking I was wasting time looking for supplies. This became really evident when I tried the 30 minute challenge last week and I realized I had to do something to help my process. My files on my external hard drive are sorted fairly well but I couldn’t search them. Yes I had copied the summary picture into one folder but what if I wanted to remember where I had a orange flower with a button. I couldn’t I had to look through them all. So I decided to tag my supplies and use Photoshop Elements Organizer to do this. I don’t use it for my pictures which I sort by event and date. So why not use it for my supplies. So I’ve spent most of my scrapbooking time this week going through my supplies and tagging each item. As some items have more one than one tag this is taking a while but even now I have found it beneficially and I haven’t even finished. It was great today when I decided I wanted to be creative rather than continue cataloging to be able to search for elements I needed or wanted without having to go through each folder looking for them! Certainly made the whole process much faster!
Photoshop Elements Organizer is really easy to use. I found it very simple to get things started and get multiple tags allocated to each item. I didn’t even read the instructions I just got started and it seemed to work. I even managed to work out how to rename a “folder” or “pile” I had created and then even to merge two. So if your using Photoshop Elements and your not using the organizer I can highly recommend the ease of using this program. Remember I’m using this for only my digital supplies and not my pictures. Anthony has warned me off using organizers for pictures and I haven’t really felt the need. But even 50% through the digital supplies I know this was the right decision to get it done. My word of warning is to make sure you backup your catalog so incase of disaster you can restore it. I haven’t yet done this but need to – as I don’t want to have to start again.

Enough words – here’s the layout I created this evening using one of the new templates I purchased last weekend.

portmerion_scenic

Supplies -

LivEdesigns-AfternoonStroll-img2 KPertiet_EmailInspiration82210PREV AASPN_FotoBlendzLTAlbum4Part2

Saturday, August 28, 2010

Changing Digital Papers Color

Sometimes when scrapbooking you don’t have the correct colored paper. Now the beauty of digital scrapbooking is that it doesn’t matter you just change the color (can I just say here I don’t think I’m going to give up traditional scrapbooking totally but this digital stuff is getting a little addictive making and I’m loving I can do it anywhere!).

The patterned papers I chose to use are these ;-
dhd_carinagardner_distressed_urbanPREV

I wanted to change the blue to match the blues more in my pictures and didn’t want the green wanted a brown. Doing this is easy in PSE 8.0. Firstly I took the papers and included them in my layout with the pictures. I then used the eyedropper tool and sampled the color of the jacket Philip was wearing. Then I clicked on the layer with the paper I wanted to change and selected Enhance>Adjust Color>Hue Saturation. A pop-up window  appears and the check the colorize box and if by magic the paper changes color. You can change it a little more if you want using the sliders. bonniedog (Large)

Using this method I also changed the color of the hearts from green to the brown – so simple, so cool and fast! Means when you buy a digital element you can use it many times in many colors and thus get lots of uses out of it.
The other special thing I did on this layout was the cut out of Philip. So easy to do with the magic wand tool and so much easier than cutting out with scissors! Can you tell I’m becoming more and more into this digital scrapbooking. That being said I’m starting my next Big Picture Scrapbooking class this next week with May Flaum – “Adventures in Scrapbooking – using your stash” - its about using up your stash. So I think I’ll have my glue and scissors out again although I’m not sure I’ll use much of my stash up as I’ve got so much of it. I really need to get into my scrapbook room to clear-up ready but haven’t made it there yet. Maybe tomorrow.

Supplies used in addition to papers -

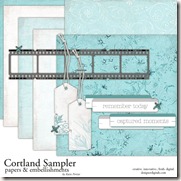
KPertiet_CortlandSamplerPREV shadows _preview_grungedges_set1_jwd kraft_single_paper Template11Preview
plus - Flergs_SBAportauprince_Heart1

Saturday, August 21, 2010

London Trip

On our recent trip to England the main reason for the trip was to visit the American Embassy to present ourselves for our renewal interview for our “visa”. We have a special visa which allows us to live in the USA due to hubbies job but it is only valid for a number of years and it was finally time for us to renew it. The kids didn’t have to attend so we flew from London to Manchester on our arrival in England and then a few hours later we caught  a train back to London. Having just flown all through the night from Texas by the time we arrived back in London we had been travelling for over 24 hours – yuck is all I can say. Then the next morning we had to be at the embassy for 9am the next morning so we couldn’t even get to sleep in and catch-up. Luckily our interview was simple and fast so we got to spend sometime wandering around London (even those in a sleep deprived state) and having lunch with my sister before we got back on the train and headed back to Manchester. By the time we finally made it to Manchester we were both dead on our feet but happy to know that our visa had been approved and we could return to Texas and continue with life. I don’t know what we would have done if there had been a problem – thankfully it didn’t happen and for that I thank God.

london (Large)

Digital supplies –Papers and digital elements  JM Designs – Travel the World; Template – Biograffiti.com – creative juice no. 21(freebie). Shadows – scrapmatters.com Jennifer Barrette designs “Get Real – Realistic Drop Shadows”.

Friday, August 13, 2010

Back from England


Haven’t posted for a while as I’ve been in England for two weeks. I had fun but glad to be back in my own bed with my own things. Its nice not to have to cook and clean for two weeks but I miss my own space and was ready to get back to the routine. Visiting England is about the grandparents and I take the kids each summer but this year we also had to renew our visas which allow us to live in the USA and we’re grateful that this was achieved in the end with ease and we can stay for five years without having to renew.
While I was in England I had the opportunity to meet up with a school friend who I hadn’t seen in 26 years so I thought I’d record this with a digital page – digital because I’ve discovered one of the great advantages of digital is that it can be done at 4.30am without waking others who may be sleeping and as I always have trouble with the jetlag this is a great advantage to me!

The layout I have created is also for a challenge for the online crop which is running at pretty paper, true stores (and scrapbooking classes with cupcakes) blog. It was a color challenge to scrap with red, aqua and white. I then decided to use the latest template from Katie Pertiet at www.digitaldesigns.com template inspiration.

one day full of memoriesone day full of memories_close (Large)

Supplies – Katie Pertiet Clock Buttons and template; Jen Wilson – worn foam stamps, paper flower – Reminisce kit from sweet shoppe designs and red paper and text swirls from Jessica Sprague.com InAWord04.

Friday, July 23, 2010

Photoshop Friday Series

At JessicaSprague.com there is a series of photoshop short tutorials called Photoshop Friday. So far I’ve bought two of these when they have been on special so they have cost me a $1 – yes that is not a typo. Now they are short and sweet but they come with a mini-kit and template to make the layout as part of the class so for a dollar they are a sweet deal. I’ve learned that like at Kohl's when shopping for digital supplies you only buy when things are on sale. Most of the digital websites have at least one day a week when things are on special and you just need to sign-up for their newsletter to know when.
Anyway yesterday I took Philip and his friend to the pool for some fun in the water at LMRA and when I opened the latest tutorial I had purchased to work through I realised the pictures were perfect for the layout. I was very proud of myself as I also actually did some photo editing before I made the layout to make the water bluer and put some ‘extra’ water behind philip. The highlights also needed some work!

Before
IMG_4735

After
 fixed

How cool is that! The reason I added the extra water behind him was so the picture would fit better in the template. In the end I didn’t need it that much as I realised I could just angle the picture – durrrr…….
Here’s the final layout. What I learned to do was using the text on curve tool – now in photoshop elements you have to use a text path purchased from someone else but I’m lucky if I want to do this Anthony has an earlier version of the full photoshop I can make the curves in. That will be for another day – for the moment I’m happy with what I did and what I’ve learned. Creating my own curves is for another day.

LMRA_Pool (Large) (2)
 

All supplies from JessicaSprague.com – Photoshop Friday Series No.10

Thursday, July 22, 2010

Snapshots of you - Dad

In January 2007 my Dad had a massive stroke and since them has spent his time confined to a wheel chair watching the world go by. I haven’t seen him since the last trip we made to England but I prepare myself for another step backwards in terms of what communication there is. Last time I visited he certainly recognised me but this time I’m not so sure it will happen from what my sisters report! Thanks to my mother-in-law I get to speak to him about once a month as she calls on her cell phone from the nursing home. I don’t know what he makes of this but I tell him I love him and we miss him and I pray that he at least understands the words.

I have been struggling with what to take with me for my next visit. The last few times I’ve taken T-shirts but really how many does he need. I send DVD’s for him and his visitors to watch for his Birthday and Christmas. So I wanted to do something different. If you’ve been reading my blog for a while you’ll know I’ve started playing with digital scrapbooking so I decided to make a layout for him which I will put in a frame for his wall. The pictures are all of him over the years. Some of my favorites from the pictures my sister Juliet got scanned by a company so we could have digital copied of them.

Dad (Large)

Supplies – Template No 19 Cathy Z, Notebook Edge Frames and KPertiet_Edges all from designerdigitals.com; Carina Gardner Distressed Urban from designhousedigital.com and jbarrette_shadowstyles from scrapmatters.com

Sunday, July 11, 2010

Technique rich layouts

Once in a while I feel like creating a page which is more in depth in terms of the techniques I use on it or the mediums I use. Last night I decided I wanted to play with my paints and glimmer mist. (One of the reasons I could never go totally digital is my love of getting messy sometimes when I’m scrapping – digital just isn’t so much fun!). So I decided I would make my own background paper. Originally I was doing it for a different set of pictures but I was moving things around on my desk and managed to knock a pile off and when I was sorting the stuff out I found an envelope of pictures from our trip in 2008 which I had never scrapped. I was flipping through them and this one spoke to me and I realized I wanted to do an ‘artzy’ page with it. Not really recording a memory which is 99% of my scrapbooking but using the image to remind me to dream about possibilities. Doing a layout like this also means I have more freedom to play with the messy stuff! Here’s what I created.

IMG_4691 (Large) (2)

The background cardstock started life as a piece of CTMH textured white cardstock. I took two masks and using tattered angels glimmer mist in tattered leather color I sprayed the paper. Once it was dry I then took some new CTMH stamps called Live inspired and used the corner stamp in this set with Tim Holtz distress ink to stamp around the edge at all different angels. The picture is then matted in twilight paper by CTMH – the lighter color is the reverse side of the twilight textured cardstock. The “dream” was a piece of pre-cut chipboard i picked up at Michaels – I sprayed with a blue glimmer mist and a copper one. The saying “Live inspired, dream with possibility” was a saying on the stamp set and I stamped it first off but it was too small so I recreated it in word and printed on an overhead. The compass, arrow and other words are CTMH rub-ons.

When finally complete I’m really happy with the look I created. May even get a frame for this one and put it on the wall rather than hiding it away in a scrapbook album. For those interested this picture is of Ecole Beach in Oregon. It was a grey and dismal day but Anthony still managed to get this picture.

Today I also made a quick digital page using the challenge template on designerdigitals.com. I used digital brushes to create my own digital background paper in a similar way with the traditional layout. Fun to see how you can recreate techniques digitally. Other supplies are :-

Winged Words Brushes and Stamps - Katie Pertiet
LivEdesigns - Afternoon Stroll
SBA-portauprince

butterflies (Large)